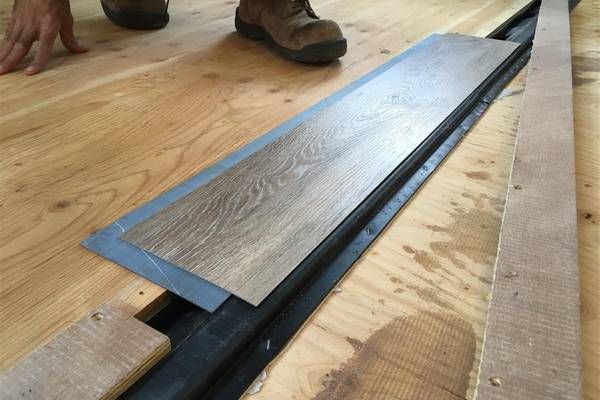
RV Styrofoam Floor Replacement and Repair (Helpful Guide)
The plywood and Styrofoam flooring in most RVs is not the best flooring material you can have. It serves a purpose and tries to give you a comfortable floor to walk on. It just won’t last especially if you get leaks.
This type of flooring keeps the weight off and helps make the trailer lighter. But it is not the most durable you can have. When it starts to sag in high-traffic areas injecting some epoxy is one method you can use to shore up the top plywood flooring material.
To learn more about this and other methods to rep[air Styrofoam flooring in your RV, just continue to read our article. It has the information you want to know about so you can do this task yourself. It is a medium to hard fix.
How To Restore Styrofoam Camper Flooring
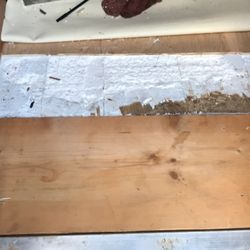
Many RV owners have run into this problem. Because of the design of the RV or trailer, the floor receives high-traffic areas and areas that get no traffic. It is usually the high-traffic areas where the Styrofoam starts to compress too much and you get soft spots.
To fix those soft spots, you can use epoxy. This material can be injected into the area and help fill up the soft spot so it does not compress when you walk on it. To inject the epoxy, you would need to drill holes in the right spots.
Now you can drill from the top, which is fine or you can drill from the bottom. The bottom is a bit more difficult as it would require some sort of hose attached to the nozzle to spray into the affected area without having it come back out on you.
The epoxy should work fine but it may not last. Other people have replaced the epoxy with some resin but that material needs some extra support so it does not compress.
Even if you choose this method, you may end up replacing the top layer of plywood anyways. That is because the constant traffic weight has damaged it in places.
There are drawbacks to using this method as well as resin as the drilling can weaken the plywood that Is not damaged. Or the styrofoam, epoxy, or resin breaks down again and you are left with the same problem. Sometimes in another spot on the floor.
RV Styrofoam Floor Replacement
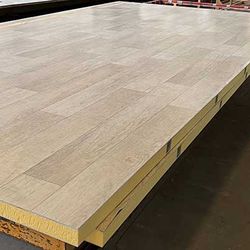
This is probably the best of all ideas. Fixing soft spots will work temporarily but they are more of a fix the symptom type repair and do not get to the actual cause of the problem.
The problem is not the compression that creates soft spots but the thin layers of plywood and the Styrofoam material. They are just not that strong to last a long time. If you have the budget for it, replacement is the best option.
When you go to replace the flooring in your RV, you will have lots of options to choose from. There is plywood and vinyl, plywood and carpet, wood planking, vinyl planking, tiles, and so on.
Your first task would be to pick which type of flooring you want instead of the Styrofoam and thin luan plywood already there. Styrofoam is used more as insulation and you can put that back in if you want. But underneath the sub-floor.
But you would need a good subfloor that is thicker than luan plywood. The thickness of the sub-floor should be greater than 1/4 inch. You want a solid subfloor for better stability and strength. Some people go 3/4 inch thick plywood even though it is heavy material to use.
On top of the subfloor, you can add whatever flooring material you want to use. One owner renovating his fixer-upper trailer turned to bamboo flooring planks. It is a strong, solid flooring material that should withstand heavy traffic. Plus, it looks good when completed.
As long as the sub-flooring is strong, durable, and protected, the type of flooring material is best left to your preferences.
RV Sandwich Floor Repair
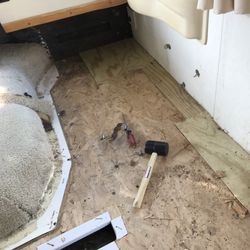
First off, the term sandwich refers to the luan plywood, foam, and luan plywood layers most RV makers use to create their flooring. The Styrofoam is the inside of the sandwich.
The second thing that needs to be mentioned is that besides heavy traffic, the foam starts to break down when it absorbs water. This is often the number one cause of soft spots in your RV’s flooring.
When those soft spots occur, you need to take quick action before they get worse. This means you have to find a good way to repair those smaller spots without ruining the whole floor.
To repair those soft spots, here are some steps to follow:
1. Find the source of the water leak- this is very important as you need to seal the leak before you replace the damaged soft spot. If you don’t then you are just setting yourself up for another repair sooner than you would like.
The water leak could come from degraded pipe connections, condensation, or a leak in your roof somewhere due to seals failing, etc. Fix the leak in the correct manner so you do not have to worry about more floor damage.
2. Cut out the soft spot- this is one option you have at your disposal. It is either do this or fill the soft spot with epoxy or resin. Your choice but the former is the better of the two options.
Cut out the soft spot by drilling some guide holes and using your jigsaw or flexible saw. Then remove the flooring material. This may be difficult as the flooring material is glued down very heavily by the RV maker.
Once the material is done, replace the old flooring with a new panel of the same type of material.
3. The epoxy option- this is not as hard as the previous method. The reason for that is you are only drilling evenly spaced holes over the soft spot. Depending on the size of the soft spot, those holes should be 6 inches apart.
Then mix up some epoxy and inject it into those holes. Do not overfill the holes. The epoxy will spread out into the cavity and supply the reinforcement you want.
The steps are not that hard to follow. The difficult part of the replacement method is removing the old flooring as it is supposed to be glued very tightly to the beams underneath the floor.
The epoxy may not last as long as you would like. It just helps you in the short term to make sure you can walk safely throughout your RV or trailer.
Can You Epoxy a Camper Floor?
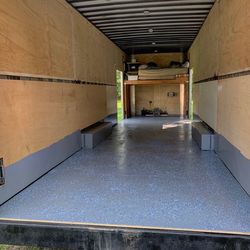
Yes, you can and it is one of the first solutions most RV owners will tell you to use. It does the trick if you follow the directions on the can for mixing the epoxy. Plus, it is an inexpensive way to fix a problem.
But epoxy is not a long-term solution especially if you do not find the leak that caused the problem in the first place or change your walking routes. This method is best for minor repairs or small soft spots.
When your soft spot is quite large, then you are left with cutting out the old flooring and replacing it with similar material or other construction flooring materials.
We cannot stress it enough but you really have to check for any water leaks that may have contributed to the damaged flooring. If you store your RV or trailer for long periods of time without proper airflow, then it will be the condensation that caused the problem.
Make sure that you store the RV or trailer correctly so that you do not have to do any repair work due to condensation. The condensation may also cause mold to grow in the sub-flooring area which will make it necessary to replace the whole floor.
When you do the cut out method, look for mold growing in those damaged areas. Then use some anti-mold chemicals to kill it before it spreads too far.
RV Floor Repair Epoxy
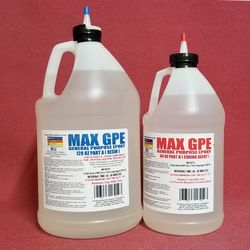
There are different brands of epoxy you can buy. Some come in large enough containers that will do more than one soft spot with ease. Others come in smaller containers that would work for very small soft spots.
1. Pro Marine- the two parts come in 2-quart jugs that should provide you with more than enough epoxy to fix your flooring. It is made in the U.s. and it can be applied to your flooring problem.
Just follow the instructions and make sure you have a proper injector to get it into your flooring areas. It may take a few hours for this epoxy brand to set up correctly. The cost is $77 approx. At Amazon
2. Beast Bond- another 2-part, a 2-quart epoxy kit that makes sure you can get your repairs done quickly. It doesn’t take long to mix and its free-flowing texture should make it easy to inject into your floor.
After injecting, it should take between 24 and 48 hours to cure. Plus, it is a self-leveling type of epoxy that should fill all those soft spots with ease. The cost is $70 approx. At Amazon.
3. Crystal Clear Epoxy Resin Kit- this option comes in 21-ounce bottles, one for each part. It too is a self-leveling epoxy that is easy to pour into those drilled holes.
There is not supposed to be a foul odor and your working time is only 30 minutes approx. Curing time may be a few hours though so give it time to set up and harden. The cost of this product is $40 approx. at Amazon.
4. Axil Floor Fit Kit- this is a 2-part epoxy designed to work with flooring materials. It is not available at Amazon but is sold on this website for approx $55.
Once mixed it should flow easily to fill any gaps and voids in your flooring. When it cures, it is supposed to strengthen the flooring material around it. Like the other epoxy options on this list, it has multiple applications so you can repair other problems around your trailer or camper.
3 Reasons Why You Have Soft Spots in Your RV
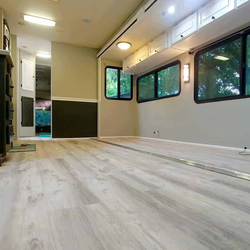
When you feel those soft spots, you know that there is always a cause. Here are the three causes that will create those annoying soft spots.
1. Water or moisture damage- it goes without saying that water or moisture can do a lot of damage to an RV if you are not careful. Water will find a way to get to different parts of your flooring even if the leak is halfway across your RV.
When it does, the foam can absorb it causing the foam to break down or weaken. That action creates the soft spot. We say moisture because humidity can often be the cause of the soft spots as can the water used in your kitchen and bathroom
2. The foam breaks down- it is not the strongest material in the world and too much weight on one spot or a lot of traffic can compress that foam. When the foam breaks down, the flooring material will buckle under your weight.
3. Bad installation by the manufacturer- these things happen as all RV owners can attest. Sometimes the fault for the soft spots in your flooring is not yours. The fault belongs to the inferior construction methods used by different RV makers.
Some Final Words
There will be times when you will experience these soft spots. If you use your RV or trailer a lot or walk in one route all the time, the foam will eventually break down. For small soft spots, epoxy is the best way to go.
For bigger soft spots, replacement is the only option. That is a lot more work but it is better, stronger, and longer lasting than epoxy. Or just replace the whole floor with something prettier but stronger than what is there now.

