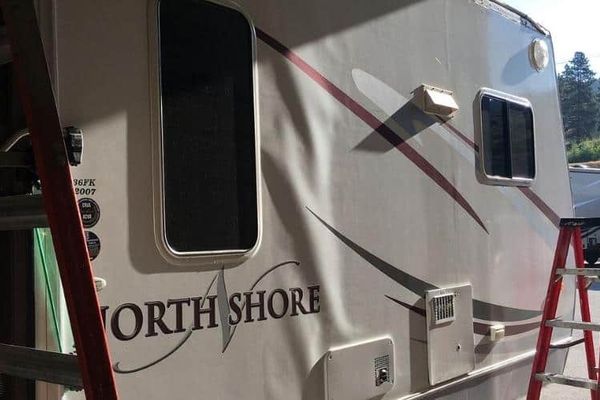
RV Delamination Repair By Drilling Holes (Repair Kit)
What appears to be simple… May not be as simple as it appears. There will be some RV repairs that cause you to think it can be done in a few minutes. But in reality, it may take a day, a week, or longer before the job is actually done. Never judge a repair by its looks.
Drilling holes to repair delamination is one of the most common methods used today. This method works to restore structural integrity and prevent future damage to your RV. The process doesn’t take that long to do but you still have to be careful when doing it.
To learn all about solving your delamination problem, just continue to read our article. It has the information you want to know about so you can decide which repair method is best for your RV situation. It does take some skill to drill the holes correctly.
What is Delamination
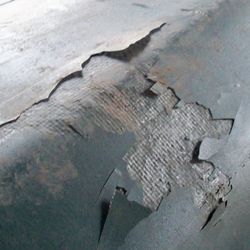
It is possible for some people to frequently hear this term. But in the long run, they are not sure what delamination is. What they may know is that this is something many RVers do not like and fear may happen to their nice expensive RV.
There are some very good reasons why many older and more experienced RVers do not like and warn newbies about this process. It can ruin your resale value, ruin your siding, cause water damage in hidden places, and more destructive work.
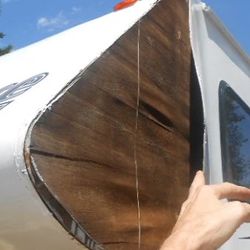
This is a problem that needs to be taken care of as soon as possible. Now that we have talked about the results of delamination, here is what delamination is- this process is when your outer skin separates from the plywood underneath.
That outer layer can be made of a variety of materials but the plywood it is attached to is usually thin luan plywood. When it separates, there is a gap for moisture, water, snow, and so on to get inside. Once those elements get inside, the interior materials are vulnerable to damage.
That damage is why so many older and more experienced RVs do not like it. The repair costs can be low if you fix the problem right away. But if you do not catch it when it is happening, then the repair bill could get very costly.
What Causes Delamination
The vibration of the road can often weaken the adhesive holding the layers of the RV’s structure together. Or the vibration and bumps in the road could damage the plywood, etc.
This damage can make the plywood come loose from the exterior skin. When it does air pockets form. These air pockets work silently causing more of the plywood and exterior skin to separate. Then when water or moisture gets inside, the process is accelerated.
While you make think this is a cosmetic issue, it is not. That is because water leaks can cause far more damage than just separating structural layers. This is a problem you need to solve right away.
If you are thinking of buying a used RV and you see delamination on the exterior, check the inside for more damage. The damage will be hidden in most cases.
How Serious is Delamination in an RV?
As you can see, this process is a very serious problem and it should be taken seriously. Not only will your resale value be impacted but you can also expect to lose a lot of money in repair costs depending on the amount of damage inside and where it is located.
Some people get lucky and they catch this process before it becomes a serious problem. They get away with just the cost of drilling some holes, placing a little epoxy inside and some sealant over the top of the holes.
Other people may find that mold has started to grow on the plywood or other surfaces under the exterior skin. Or they have enough water damage that they have to replace walls, flooring materials, and other components.
If the water and moisture went into the wrong areas, there may be wire damage, corrosion, and so on. This is a small problem that could expand to a very bad situation if the delamination is not addressed right away.
If the leaking water damages the plywood underneath the exterior skin, then your RV will become unstable and make it unsafe to use. In an indirect way, a delaminated exterior can interfere with your aerodynamics and cut your fuel efficiency.
Plus, it can also lead to swaying and other driving issues. This problem doesn’t sound like much when you first hear about it but it does have a wide array of effects on your RV and budget.
Does Delamination on The RV Mean Water Damage?
Not necessarily. If there is any water damage it will depend on the severity of the delamination, how long it has been left, and where the delamination is taking place.
The longer you leave this problem, the greater the risk of water damage to the interior of your RV. If you catch it right away, as one owner did, there is a good chance there will be no water or moisture damage.
Of course, the weather will also play a role in this possibility also. If you camp in dry, non-humid areas of the country, you should not expect to see much water damage. You may get some moisture damage but that is not as severe as direct water damage.
It is best to get the problem solved as soon as you see it take place. That is the only way to avoid any further damage to your RV. Remember, the hidden damage may not show itself for a few years.
Water damage can take its time to build up and one day you step into the bathroom and your foot goes through the floor. Water damage is very sneaky as it will also occur feet or yards away from where the leak is located.
Can RV Delamination Be Repaired?
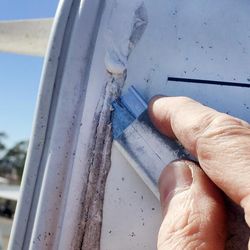
Yes, it can and this is where an RV repair may look simple but instead can take a long time. The length of time will depend on the method you choose to use. One owner did not use the drill method and his repair took him 7 days to complete.
There are several issues you have to take into account before you start the repair process. One is where will you park your RV while it is being repaired? Another will be, do you have a cover to protect the opening if it rains?
In most cases, you will need several sunny and warm days in a row to make the repair work. Also, you will have to decide on how many areas you will treat during the initial repair.
This decision will depend on how widespread the delamination is and where it is. In some repair methods, you will have to develop a bracing method to hold the exterior skin to the plywood underneath.
There is a lot more to think about than just getting your drill, some epoxy, and sealant and starting working. There is also a lot of work involved that will make this repair more complicated than it seems.
Sometimes it is better to hire someone who does this for a living as they know all the tricks. They can also do it faster than you.
How Can Delamination Be Repaired?
Here is one method one owner used. He did not use a drill but he still used epoxy to adhere the exterior skin to the plywood underneath.
1. Identify the delaminated areas- mark them with painter’s tape so you can plan your strategy and see what needs to be done. You need these marks because it is more difficult to see the delaminated areas when you are up close.
2. Remove trim, etc.- you need to gain access to the delaminated areas so you can inject the epoxy. This means removing trim, doors, and windows if necessary.
One of the complications of fixing this problem is that once you get underneath the exterior skin, you may see more delamination taking place. If you have the plywood separating from itself, that is another area that needs to be injected with epoxy.
3. Mix the epoxy- you should do this in smaller amounts, no more than 6 ounces due to the nature of the adhesive.
4. Fill the injector- this will be the device you will use to inject the epoxy. Normal syringes may not be enough and you may have to use something with clear plastic tubing.
5. Inject the epoxy- make sure to get all the areas you need to be sealed. Also, just do one area at a time. The reason for that is you need to brace the area immediately with pressure. You can use a temporary clamp till you get the real bracing in place.
6. Repeat this process until all the delaminated areas are treated. Then re-install any trim, doors, or windows you removed. Curing should take between 15 and 24 hours PER section.
RV Delamination Repair By Drilling Holes
Have the right tools for the job. The first thing to do is gather your tools and they will start with a variable speed drill and drill bits designed to cut through metal. You will also need a marker to mark the spots where you will drill.
Once you have all your tools and do not forget the extension cord, mark the spots where you will drill. Make the marks in an even pattern that will cover the entire delaminated area.
Once the marks are drawn, start drilling. But here is the tricky part. You should only drill deep enough to pierce the metal and not dig into the plywood underneath.
After this is done, mix your epoxy and put it in your injector. Then inject the epoxy into the holes. Make sure to do every hole and when you are done doing this, fill the hole with sealant.
You may want to clamp the area for a better fit but that is up to you. Again, just do one area at a time. Then give the epoxy time to cure which can be a day or so. The time it takes to do this method will depend on how many areas you need to fix.
The drawback to this method is that you do not get a view of the interior area to see if there is any water damage or not. After you are done, add regular inspections of your exterior skin to your weekly maintenance schedule.
You will want to catch any delamination before it damages your RV.
RV Delamination Repair Cost
If you are doing it yourself, then you will save on labor costs. Those costs can be quite high depending on where you live or are staying at the time of the repair.
The first method we described cost about $200 in materials only. The drilling method may not cost that much as all you will need will be a drill, which you should already have, some drill bits, epoxy, and some clamps if necessary.
The real costs will be if you did not catch this problem soon enough. Those costs will include removing and replacing interior plywood, paneling, flooring materials, studs, and more.
There is no guarantee that you will have to do all of that but it is a possibility. Then the repair costs will go up depending on how many areas you need to fix. One area should cost you a lot less than $200. Read more about RV delamination repair cost.
RV Delamination Repair Kit Options
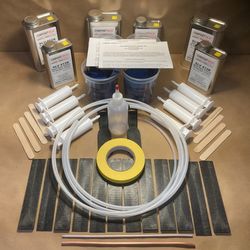
If you go to Amazon, you may not find complete kits but you can buy all the components you will need to do the repair effectively. That marketplace has the epoxy, the injectors, tubing, and so on.
Those are on sale but we did see one or two repair kits with everything you will need except the drill and drill bits. The cost at Amazon for one kit is $66 approx. And that is far cheaper than the next website.
This website has several kits available. The prices range between $135 & $380 but there are more than enough parts included in these kits to make it worth it. The owner whose method we described above, made his own repair kit and you can do that as well.
If you do not like shopping at Amazon or any other online place, go to your local RV parts and accessories outlets or hardware stores and see how much all the items you will need will cost.
In some cases, the repair kits are going to be the most expensive part of the repair.
RV Delamination Repair Glue
The ideal glue for this process will be the one that is made for the exterior surface of your RV. Not all glues will adhere to gel or fiberglass and so on. So you need to look at the labels to see if the glue will work for you.
In almost every case we looked at, the people talking about this repair used and recommended epoxy. That should be the ideal adhesive to use. But many adhesive makers advertise a strong glue that they make that may or may not be epoxy.
Just make sure the brand you use is made for your target areas. These are just some of the brands you can consider- West, Max General Purpose, The Epoxy Store, Gorilla, Three Bond, Git Rot and Compostet Products.
There may be others and Max GPE was what was being sold on Amazon. Pick the best glue that fits your budget and do a good job. Some kits already have the glue included so you may not get much of a choice.
How To Fix RV Delamination
The way to fix your delamination process is to make a decision on the method you will use. Besides the two we already mentioned, there are other methods like- epoxy injections, fiberglass matting, and resin mixture, or a combination of these techniques.
Once you have researched these methods you pick the best one for your RV’s exterior skin and start getting prepared. Keep in mind that all of these methods, including the two mentioned earlier, are not perfect.
Moisture may still find a way in through the sealant and all your careful and hard work. If you are drilling holes, make sure not to go too deep. You never know when you may put a hole into your living room, kitchen, or bathroom.
With all that said, you still need to make sure your work is done when it is going to be dry and sunny. Working under cover is not a way to keep the moisture away from your RV’s interior.
DIY RV Delamination Repair
If you are ready and prepared to do this work, then a DIY repair is not out of the question. You will save some money on labor and materials and that is always a good thing.
The most difficult part of the drill method is drilling just right. ‘Just right’ means that you pierced the exterior but did not drill into the plywood underneath. If you have that level of confidence, then this option is for you.
Then, you need to be prepared for the length of time it will take to do these repairs. If you only have one area to fix, then you are lucky and it may not take long to do the drilling, etc. The longest part is waiting for the epoxy to cure.
Every method that we mentioned is a DIY repair option. You just need to know your abilities and limitations.
Repairing RV Delamination
This can be complicated work and you do need to be a patient person to do this repair correctly. If you are in a hurry, then mistakes will be made and you will be looking at spending more money repairing those mistakes.
But if you have the patience, the confidence, and the right tools for the job, it is only a matter of time before the repair work is over. If you feel you are not up to the task, there are companies out there that will do the work for you.
Shop around to get the best price and the best quality of work. Also, make sure to watch the weather forecasts to see when you will get a few sunny days in a row.
This work needs to be done carefully and at a steady pace. Plus, you need to do it one area at a time to make sure the repair work takes hold and solves the problem.
Best Epoxy For RV Delamination
You already know that the best epoxy is the one that will work with your RV’s type of exterior surface. But when it comes to brands, not all are the same. Some make great epoxy while others make it less powerful.
Composet is the epoxy that the repair kit company puts in its repair kits and it is supposed to be good. Other people may recommend MAX GPE and still more will recommend other brands.
Go to the RV discussion forums and you will get a lot of suggestions. One owner said he used commercial-grade contact cement while another said that his son’s repair shop uses Stabond E-183 Adhesive.
You can look at 3M products as that company has a solid reputation for making quality products. You have a lot of choices out there so get the one that will do the job as well as fit your budget.
Some Additional Words
RV repairs are not always as simple as they look. Delamination repairs can take a long time to do, especially if you live in an area that gets a lot of moisture.
The key is to estimate the amount of area you have to repair, the material costs, and if you are up to the task of DIY. Sometimes it is better to pay a professional so you can relax during the repair time.

