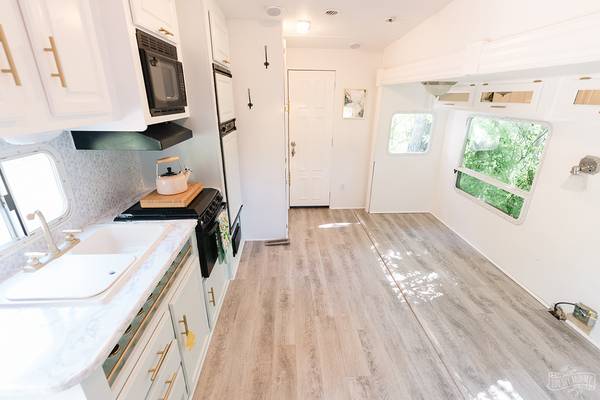
RV Vinyl Plank Flooring: How to Install Without Problems
Flooring materials wear out. This is a fact of life whether you own a traditional home or an RV. Finding the right flooring material that doesn’t add a lot of weight to your trailer is another story though. Many owners go with a vinyl-type floor material that is supposed to last a long time.
When it comes to vinyl installation, you have to leave room for any expansion or contraction that takes place when the temperatures change. If you do that, then your flooring installation should last you a long time and keep your interior looking great day in and day out.
To learn more about this flooring installation option, just continue to read our article. It has the information you need so you can make a good decision when replacing your current flooring in your RV or travel trailer.
Can You Put Vinyl Plank Flooring in an RV?
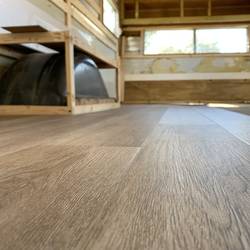
Yes, this is a very good option to try out as these flooring materials look good and are easy to clean. Many owners have done this over the years without any real trouble. It just takes some time to install.
When you read the box, the makers of the different vinyl plank flooring materials will say that the flooring is not recommended for RVs. Their hesitation comes because of the usual temperature fluctuations that RVs go through throughout the year.
RV and trailer owners have read those warnings and installed the material anyways. Most leave a gap around the edge to accommodate the contraction and expansion that vinyl goes through when the temperature changes.
If you install the flooring right, you should not have any trouble in your RV or trailer. The flooring in most cases is waterproof and should protect the sub-flooring without any problems.
Of course, when you talk to salesmen, they may not mention that warning as they probably want a sale. But if you are careful you should have no problem as some owners have had this material on their floors for years now.
RV Vinyl Plank Flooring Pros And Cons
With every product you buy, there will always be good and bad points which you need to take into consideration before buying the product. Here are a few pros and cons for this flooring material to help you get a better idea about it:
Pros:
- easy to install
- lots of design choices and colors to choose from
- not very expensive and should fit most budgets
- moisture resistant
- easy to clean and is a low- maintenance product
Cons:
- some vinyl plank options give off a gas substance
- may fade a little bit when in direct sunlight
- can be dented with enough force
- does not decompose like wood can
- hard to remove once installed.
Not all of the vinyl floor plank systems out there come with the gridlock system of assembly. Many have to be glued down into place making it very difficult to remove the pieces if you want to make a change.
Other than that, the design and color options should make up for any of the cons as your interior will look like you have a million-dollar floor.
Problems With Vinyl Plank Flooring in RVs
Different vinyl flooring systems will have different problems if they have any problems at all. Some, like the Allure brand, seem to withstand lots of cold and rough treatment when placed in an RV or trailer.
One of the problems with bad installation or cheaper products is that the bounce of the road could pop up a flexible tile and you would have to spend time putting it back in place.
Manufacturers have said that the floor may get damaged if exposed to very cold temperatures for a very long time. This could happen but we have not come across any horror stories yet.
One problem with the Allure system is that the company changed the design of its gridlock system. The new design is not compatible with the old one so you cannot buy one or two pieces and slip them into place when replacing damaged old flooring.
You have to buy a completely new floor to use the new design. Other problems have been listed in the con section above. If you drop heavy objects onto the floor, it could dent. Fading may be an issue if your floor is constantly in direct sunlight.
Expansion and contraction will be an issue as well. You have to make allowances for that behavior or you may have problems with the flooring when the temperature changes.
Installing Vinyl Plank Flooring in a Camper
This can go either way. Some owners recommend the gridlock style while others recommend the glue-on style. There are good and bad points for both systems and you have to do your research to see which will be best for your camper.
With the gridlock system, you should leave some space between the floor and the wall to allow for the expansion that does take place with this type of flooring. Plus, you should have a good sub-floor plywood material underneath the vinyl. This helps stop the flexing when the RV or trailer goes down the road.
The problem with the glue method is that if you change your mind 5 years down the road, it can be a real pain to remove the vinyl flooring. The removal will take longer than the installation of the new flooring material.
The floating method is supposed to provide room for the material to expand and it does work for some people. You would have to do your research on this material as there are some very good brand names to use and their systems work much better than the off-brand options that are out there.
Should You Glue Down Vinyl Plank Flooring in An RV?
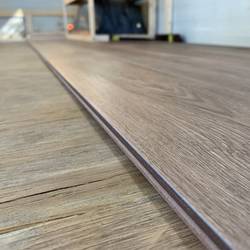
You can and this is one of the options that you have available to you when you go shopping for this type of flooring material. The key is to make sure you have enough room for the expansion that takes place.
Also, gluing is permanent which means that you are stuck with the flooring material for a very long time. As you already know, removing glued items is very difficult to do and the same situation applies to vinyl flooring.
Once it gets on the sub-floor, you may have to replace the sub-floor material as well. Many owners recommend the floating systems for this very reason. Gluing works well and should hold the panels in place no matter what type of road you go down.
That is if you pace a solid sub-floor underneath it. Nothing less than 1/2 inch plywood will do the trick and possible, nothing less than 3/4 inch plywood is the best measurement to use.
Everyone is going to have their preference and some owners prefer gluing while others prefer the floating system. The key is to buy the flooring that you want and will work best in your RV and with your budget.
Installing Vinyl Plank Flooring in RVs With Slide
This can get a bit tricky as some vinyl floor planks can get to about 3/16 of an inch in size or 5mm. This means that those options may be too thick to fit under the slide-out. You have to plan carefully when installing a new floor in an RV or trailer that has at least one slide.
The vinyl needs to be thin enough for the slide-out to close correctly without damaging the floor or the slide. If you have carpeting inside your RV, etc., then you have to make sure you pull all the staples out.
You can try banging them flush into the sub-flooring but that is not a good idea as the staples can work loose and eventually damage the vinyl. It is going to take some work to get the new flooring to work with the slide-out because of the factors involved.
You do not want to cause problems for the motors operating the slide-outs so you have to measure to see how much room you actually have to work with. Fitting the slide-out with new flooring has its own set of challenges.
One of those challenges will be matching the end of the slide-out flooring with the flooring on your main floor area. It will be tricky but it can be done if you are skilled and patient enough.
Replacing Carpet in RV With Vinyl Plank Flooring
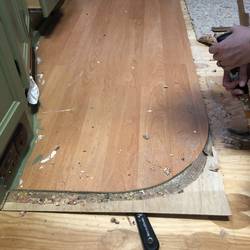
Owners have done this already and the key to this task is to make sure you remove all the staples holding the carpeting in place. This is an essential part of the task that must be done completely or you may have trouble with your new vinyl floor.
To get the staples out you can use a flat-head screwdriver to pry up one end. Then grasp that end with a pair of pliers and pull. Or if the screwdriver is large enough, you can just pry the staple out completely.
If that fails, use a pry bar, crowbar, or nail puller to get the leverage you need. There are a number of tools you can use to remove staples. The key is to get every one before you start laying the new flooring material.
There is nothing wrong with replacing the carpet in your RV with vinyl. The floor will be easier to clean, harder to damage with spills and it is low maintenance so you do not have to do the work you would if a carpet is there.
It should last longer than the carpet will as well. The trouble with doing this task is that it can take quite a few hours just to remove the carpet and staples.
Best Vinyl Plank For RV
The one recommended by most owners was the Traffic Master Allure brand. The word is that most of the owners who installed this option had no complaints, even when the temperatures sank below 0.
This product comes in two styles, TrafficMaster’s luxury vinyl tile (LVT) and luxury vinyl plank (LVP), and there is a basic, good and best levels inside each of these two options. You would have to do some research to see which one will fit your RV or trailer the best.
On another list, the Shaw brand was the one selected to be the best for RVs. It also comes in two styles with the better style having the better warranty. It is easy to install but the thickness of the planks may be too thick for those RVs and trailers with slides. You would have to measure to make sure they would fit.
Plus, you get a wide range of designs and colors to shape your interior any way you want it to look. Off-gassing should not be a problem with this option.
Those are only two of the many flooring options you can choose from. They come highly recommended but the top 5, top 10 lists are full of other brands the reviewer prefers.
Most likely, they will all come with the same warning that they should not be used in RVs but that is a judgment call. Many RVs and trailers do not endure cold winters and are located in regions where the temperatures are fairly stable or do not have wide fluctuations like the mid-west and Canada do.
Some Final Words
If you want to upgrade the look of your RV’s interior or replace hard-to-keep clean carpeting, then vinyl flooring is a good option. It is safe to use, easy to clean, and comes in many designs and colors so you can match the colors perfectly.
Do your research as you need to find the right option for your travels. Grid locking or adhesive styles have their strong and weak points so you need to make a judgment call here as well.

