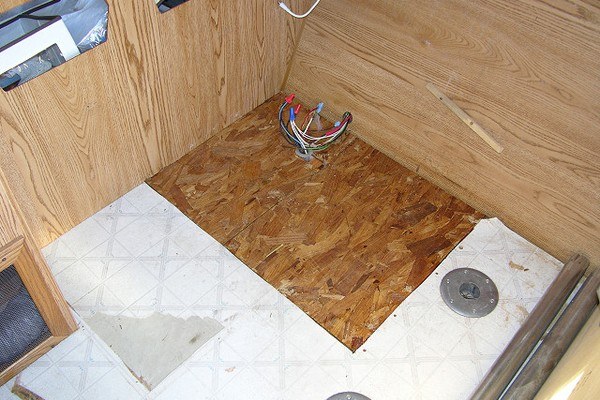
RV Spongy Floor Repair Kit: How To Fix Soft Spot in Camper
One of the most vital parts of an RV is the flooring. When you have a solid floor underneath you, it is possible to live normally and without worry. However, those floors can get damaged, making RV or camper life a little unsettling. That is until you save the money up to have the floor repaired.
This ‘simple’ and ‘easy’ repair can be quite a job. Most often, it requires the old soft flooring to be removed, then a piece of new flooring put in its place. But the job can have some hidden surprises, and covering the old floor with thicker plywood may be the easiest answer.
To learn more about repairing a soft floor in your camper or RV, just continue to read our article. It has the information you want to know about in order for you to do an excellent job replacing the old soft spot with solid new flooring material.
Why do Campers Get Soft Spots On a Floor?
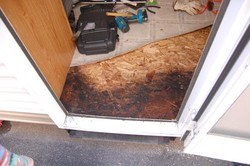
There is only one answer to this question- moisture. That moisture can be in the form of drips from a faucet, dropped water glasses, or easy paths for water to follow when it rains. No matter the method, moisture is the enemy of all wood products.
When water or other liquids get absorbed into the wood, that spot will get damaged and eventually ruined. Moisture helps the wood to expand, bloat, twist, and lose its integrity. When that happens, the only option you have is to replace the damaged section or cover it up with a new floor.
The latter option may mean removing the toilet, the cabinets, and other pieces of furniture in order to do a thorough job of repairing the floor. The former repair option may be easier, but you still have to make sure the floor returns to level prior to the wood softening.
That makes this repair a little trickier than you may think. if you are going to do this repair yourself, make sure you have some good DIY skills as those will be needed. These seemingly simple repairs can turn into a monster of a job if you are not careful.
How Much Does it Cost to Repair a Soft Spot On The RV Floor?
We hate to use it, but it will depend on the size of the soft spot, location, and whether the problem can be resolved. By that, we mean if the source of the moisture can be tracked down and sealed. You do not want to have to fix the same problem over and over.
If you can do it yourself and the location of the soft spot is in an ideal location, you may be able to get away with spending a few hundred dollars, give or take a hundred. It is hard to estimate because there are too many mitigating factors involved.
Then if you decide to have professionals do it, the bill could run you into a thousand or more dollars. This cost will depend on several factors as well. The location, size, and materials that will be used to replace the soft spot will add significantly to your costs.
Then the labor charges will not be cheap. If the repairman has to remove furniture, cabinets, and other items, expect your costs to go up as you need to pay for the labor to re-install them.
The best thing to do to ballpark your costs is, one, get a price list of materials you will need and two, get an estimate from a professional. Keep in mind that costs change due to hidden issues that were discovered after the flooring was pulled up.
Does RV Insurance Cover Water Damage?

There is some good news here. Yes, you can get your RV insurance to cover the damage caused by water. But, you have to have the right kind of insurance. Accident insurance is for damage due to accidents and does not cover water damage.
The type of coverage you need comes from comprehensive insurance policies. There is some bad news, though. You have to make sure the policy will cover water damage and in what forms that damage is produced. Dropping or spilling water on your floor usually is not covered.
There are many different types of RV insurance, so you need to read through the details to buy the right one. The insurance agent may not tell you everything, or they may fudge a little bit, so do not rely on them to give you the straight insurance coverage story.
Make sure you find out the sources of the water damage that will NOT be covered before buying. This is very important as you may buy insurance thinking you are protected when you are not.
Also, the attitude of your insurance company will play a role in this scenario.
Types of RV Insurance Coverage
What follows are a few of the different types of RV insurance packages you can buy. There may be one or two more, but you would have to check with your insurance agent to find them.
Each insurance company is different when offering policies, so it pays to shop around first and get the best deal possible. here are your options:
- Liability - this protects you when you cause damage to other people’s property or their bodies.
- Collision - protects you when you have an accident or accidentally hit a tree, etc. Hitting animals is not covered.
- Uninsured motorist - just what it says, this policy protects you when the other person involved in the accident doesn’t have insurance.
- Comprehensive - covers replacement or repair costs that are not the result of an accident.
Some types of water damage that are not covered comes from the following sources:
- Freezing temperatures
- Age-related issues
- Manufacturing issues
- Water leaks
- Dry rot or rust
- Snow and ice
- Improper maintenance and storage
While this seems like just about everything that can happen, it is best to double-check with your insurance agent. There may be exceptions to these rules.
How to Fix a Soft Spot in Camper Floor
One reason it is vital you fix these soft spots as quickly as possible is for safety. You do not want yourself or your family to fall through the floor and hurt themselves. Then, you especially do not want a guest to do that either. They could sue or make an insurance claim that eventually raises your rates.
When it comes to repairing, the ideal flooring to have underneath your feet is plywood. If it is particle board, the repair task just got a little harder. This is one of the factors we mentioned earlier. Cutting particleboard is a lot different than cutting solid wood, which is why you want plywood instead of that material on your floors.
After determining what kind of flooring you have, you need to find the size of the problem. Once that is done, you will need to cut a few inches beyond that boundary in order to add the replacement piece.
When you are getting ready to cut your soft spot out, you really should cut the piece so that it exposes the stud. That way, you have something to nail or screw into when you replace the bad spot.
What you do not want is for the studs to be damaged by water as that is a very expensive repair and a lot more work. When you have marked the area, you need to cut out, set your skill saw blade to reach the depth of the plywood.
You do not want to go any deeper because you may cause more damage by cutting something you shouldn’t. Once you made your cut, you can use a nail puller to any nails holding the flooring to the studs, or your hammer and pry bar can do the same job.
After the nails are up, pry up the plywood and cleanly get it out of the spot. Now, take accurate measurements and cut the replacement plywood to fit the size of your hole. Lay it in the spot, and you can either nail it into place or use screws.
RV manufacturers may use staples to hold the old plywood in place so use a flat head screwdriver and a pair of pliers to remove those before you lay the new piece in place. Or you can just hammer them down into the joist.
You can use cleats to help support the new piece of plywood, but they are not usually necessary if you expose the joists and nail them into those. Cleats come in handy if you do not want to expose the joists.
The key is to use the same thickness of new wood as the old wood. This helps keep the floor level. If the floor is not level, then you might need a floor leveling compound, and that is a repair for another time.
RV Spongy Floor Repair Kit
We have seen one at Amazon, but we are not sure if this is a good idea. This is a two-part epoxy-like compound that you mix together before injecting it into your soft floor area. The purpose of this epoxy is to hold the soft flooring together and make sure no one falls through.
According to the labels, the time it takes to work is roughly 1 to 2 hours, with a 24 hour cure time frame. That means you cannot use that section of your RV for up to one day after repairs.
Since this epoxy sticks to wood, metal, and other surfaces, chances are that it will stick to your soft floor material. You have to give it time to work. You have to make sure that it seeps into all the crevices, cracks, and holes under your flooring. If not, you may not have solved your problem.
You can use other compounds, and these repair kits are a lot cheaper than the method we described in the previous section. We cannot guarantee that your problem will be fixed or if this or any other kit will work as advertised.
This is a trial and error type repair option that may or may not hold. You will have to make your own decision on this, and if you are on a tight budget, it may be the only choice you have but don’t hold your breath.
RV Sandwich Floor Repair
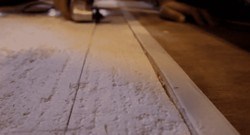
You can try different methods that will make your repair solid and nice to walk on. What follows is just one option that is available for you to consider. The first step is to remove the entire sandwich piece that lies between the two aluminum rails.
Next, you can tap and screw in a piece of angle made from aluminum and make it flush to the bottom of the flooring. Then to get the right floor thickness, you can glue and screw two pieces of 3/4” plywood together. Use drywall screws, and make sure to cut these pieces to size before gluing and screwing.
Then screw this piece into the aluminum using the appropriate screws. This should bring those pieces of plywood flush to the top of the aluminum frame, so you will need to add a 5 mm piece of luan plywood to the top of the plywood. That should level the floor for you.
This may be overkill to some people, but it is better to have a solid floor than a weak one. You may be able to find a method that is a little easier, cost-effective, and not as labor-intensive.
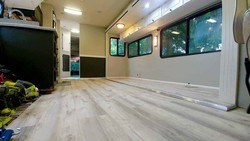
Can You Put Vinyl Plank Flooring in an RV?
Yes, it is possible to do this, and putting in this floor will be similar to putting in a wood floor or adding carpet to your RV. The key to adding this material to your RV is the subflooring.
If it is in good shape, you should buy some polyurethane and coat the sub-flooring to protect it against water leaks. This is not mandatory but a good damage precaution. Then if the flooring is not in good shape, you will need to make repairs as described above and still do the polyurethane step.
Once that is done and dry, your next step is to add a layer of the vinyl plank. If you do not know what this flooring material is, it is similar to linoleum or vinyl sheets, just thicker. That extra thickness makes the material more durable.
You can install an underlayer for insulation and added water protection, but it is not necessary. Also, you can install this material over existing flooring material, except carpets, IF the original flooring is in top shape.
The planks usually come with the tongue and groove construction system, making installing the vinyl straightforward. The tricky part of this installation will be cutting all the corners and curves found in RVs.
The Leading Cause of Water Damage
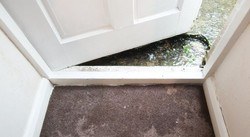
There are always several ways that water can get to your subflooring. Remember that water follows the easiest path possible. The cause that leads all the options is leaks. This is especially true if you own an older RV.
Unfortunately, leaks can occur in newer ones just as easily and more so if you do not do proper maintenance. The problem with fixing the leak is that the water can get in next to your air conditioner but does not appear until it reaches your sofa area. Water will travel far from the leak if it is the easiest path.
By the time you spot it, the damage may already be done. There are steps you can take to minimize these water issues. The first is to do very good maintenance. Take time to inspect the caulking around windows, vents, air conditioning units, and even the edge of your roof.
Filling those with the right caulk, and you may have to remove the old before refilling, is a big step in stopping water leaks. Next, check your seals no matter where they may be. Seals can get old, dry out, or damaged by freezing temperatures.
The quicker you can seal the leaks, the safer your flooring will be.
Some Final Words
For the most part, fixing spongy flooring issues takes a little time. The repairs are not complicated, just annoying as you may have to remove objects from the room to do a great job.
The key is to remove all the damaged wood and replace it with better materials, then go find and seal the leaks. Good floor maintenance will preserve the value of your RV.

