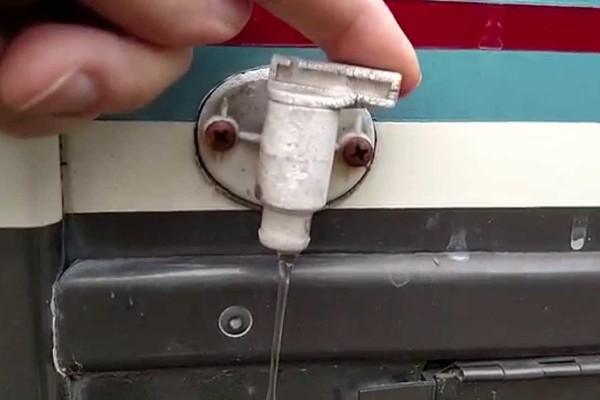
RV Water Tank Drain Valve: How to Drain RV Fresh Water Tank
RVs tend to provide their owners with a lot of freedom. You can go just about anywhere you want, when you want. However, RVs don't get you freedom from responsibilities. That means you'll always have something to do even when you RV full time.
The first step is to locate where your freshwater tank is located. After you find that, you have to look for the drain valve. This may or may not be labeled so be careful or you might miss it. Then you have to open the valve and give it either a 90 or 360-degree turn after hooking up the hose.
To learn more about how to drain your freshwater tank, just continue to read our article. it gives you needed information as some people are new to RVing and their owner’s manuals are not very informative. Nor are the dealer’s they bought their RV from.
How to Drain RV Fresh Water Tank
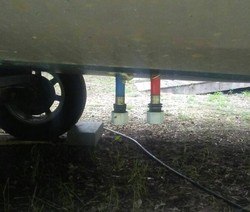
When it comes to RVs manufacturers like to play hide and seek. They hide different parts and the owner has to seek them out. Sometimes the game is easy and other times it is not so much fun.
Freshwater tanks are part of the former. They only have 2 locations where they can be put. Either there are inside beneath the couch or other piece of furniture or they are underneath your RV.
The inside location provides better insulation but that doesn’t make draining them any easier. After finding the location of your fresh water tank, you need to search for the drain valve. This search adds to your fun.
If your freshwater tank is located inside your RV, you might have a little more difficulty in finding the drain valve than if it were located underneath the RV. Generally, the drain valve is at the bottom corner or the lowest point of the tank. Sometimes they are located on the side of the fresh water tank.
Watch out that you select the right part as there are different hoses hooked up to the fresh water tank. The valve should be white and have a turn handle. After you find that, just open it up. There may be a ‘vent plug’ you will need to open as well in order to let some air pressure in to help drain the water.
Since this is fresh water you are draining, you can dump it anywhere. Finally, you can sanitize the tank with a little bleach and a good rinse. This doesn't have to be done every time but regularly.
RV Fresh Water Drain Valve Location
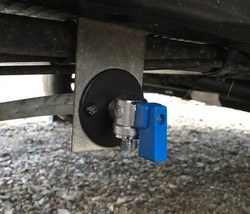
Common sense will tell you that the drain valve should be at the bottom of the tank and the lowest point the tank has. That way gravity is all that is needed to let the water drain out. The problem with this common-sense thinking is that it may not take into account the many different places that low points can be found.
Generally, the drain valve is found in the bottom corner of the freshwater tank but RV manufacturers being who they are, will also place that valve along the side of the fresh water tank and possibly one end.
It is possible that your owner’s manual or dealer may not tell you the exact location of the valve. make sure to ask so you have expert advice and can find it the next time when you need to drain it.
You should drain it regularly as the water inside the tank may only last a couple of weeks. That is if you get your water from a reliable and chlorinated, filtered source. Any other source and you may have to drain more frequently to keep the water fresh.
RV Water Tank Drain Valve on Jayco
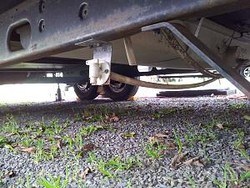
On Jayco models, not only do you have to seek the drain valve, it may be very difficult to see. But it is there amidst all the other parts. The problem is that some models have it on the driver’s side and other models have it on the passenger side of the RV.
In some models, the valve is located behind a carpeted wood panel behind the overflow hoses and the propane door. Once you get to that location, you have to reach your hand up and feel for the valve. After getting your hand on it, you open it up and move out of the way.
On the driver’s side, you may have to look for a white 90-degree valve and turn that. It is about halfway back and near the freshwater tank. In some images, we noticed that there is a little white box the white valve is attached to. That would be it.
Jayco is known for putting different important parts in weird locations and one owner said you need a double-jointed arm to access the freshwater tank’s drain valve.
Where Can I Drain My RV Fresh Water Tank?
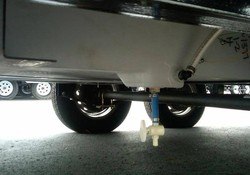
The fresh water tank is going to be one of the easiest tanks to drain. There are no real regulations that we found governing where to drain your freshwater. Since there are no bacteria, germs, shampoos, soaps, and other items in your freshwater tank, you can drain it just about anywhere you are at.
You do not even have to hook up a drain hose to direct the water to go into one specific spot. Just open the valve and let her rip. When you go to rinse your fresh water tank, you may not have the same freedom though.
If you use bleach to kill any possible germs that may come to the freshwater tank, you may have to find a safe spot to empty the tank. Or you may have to drain it into a portable container to make sure the bleach does not damage the ground.
After putting bleach inside and letting it swirl around for a while, you need to open the valve and drain again. Then you should rinse about three times to make sure all the bleach has been removed. These instructions go for any cleanser you use to sanitize your fresh water tank.
RV Fresh Water Drain Valve Leaking
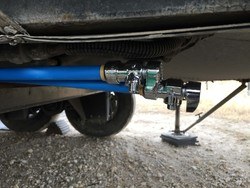
This problem has several sources to it. If you are drinking water with a few minerals in it, the mineral deposits can ruin the seal and keep the valve from closing for you. That leaves just enough of an opening for water to escape.
To fix this issue, you would have to take the valve assembly apart and give it a thorough cleaning. It is not a tough job but it can be an annoying one. Or, there is a problem with the seals hardening up on you.
Some people say using a food-grade lubricant or plumbers grease will soften those seals so that they get back to the right consistency. Again, you would have to disassemble the valve and do the lubrication application right.
Or there could be something wrong with the knife valve cable. The manual operation may solve the problem temporarily but you would have to fix the cable eventually. Also, if the problem persists, you should bring the valve assembly out from underneath the RV and into the sunlight.
The extra light will help you see the tiny debris that can block the proper closing of the valves. You never know where those tiny bits of debris come from and it may be a smart move to add a filter on the intake side of the fresh water tank to minimize that from happening.
Draining Fresh Water Tank on a Forest River RV
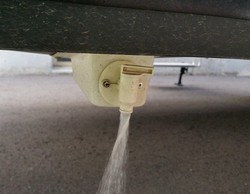
This is an easy task to do if you can find the fresh water drain valve. Some people do not get training from their dealers and do not know where these parts are. Sometimes owner’s manuals are no help even with Forest River models.
On many of the RVs that Forest River makes, the low point valve should be the drain valve. There is a little white box-looking object underneath your RV. That box should also have a white-colored valve attached to it.
The box and the valve should not be hard to spot as dark-colored parts are surrounding this point. On the valve, there should be a little turn handle at the top. Just turn it as far as it goes to open it and the water should pour out.
What can confuse people is that the fresh water tank is sometimes located at the front of a Forest River travel trailer while the drain valve is located at the rear near the city water connection.
Some Water Tank Tips
In case you do not know, the term ‘potable water’ refers to water that you can drink. If you see government or campground designs that say non-potable water, do not use it to fill your fresh water tank.
That is just to clear up anyone’s confusion. Here are some good tips to follow to help keep your water tanks fresh:
- 1. The potable water hose should only be used for potable water. Nothing else. It is not for draining your gray water tank.
- 2. Sanitize your fresh water tank regularly- the amount of bleach you use should be about 1 cup for every 15 gallons of water you put in your tank. However, be forewarned as different RV owners use and recommend different amounts of both ingredients.
To fully sanitize your fresh water system you will have to run the bleach and water mixture through your water lines up to the faucet. Then let them soak for a few hours before draining and rinsing.
- 3. Stinky sink solution - you can pour about 1/2 of a can of orange soda down the sink drain to rid yourself of the foul odor that has been gathering in the drain hose. The carbonation will help remove the build-up while the orange scent should cover the odor.
- 4. Use filters - not only for the intake line for your fresh water tank but also for your gray water tank. Letting food particles get into the gray water tank will add to the odors you smell if you haven’t drained the gray water tank.
A filter on the fresh water intake system will help protect your seals and drain valve from damage.
- 5. Baking soda cuts odors - not for your fresh water tank, but for your gray water one. Put about a spoonful or two into your sink and wash it down into your gray water tank. This will help cut odors.
- 6. Chemicals help - more for your black water tank and many people already do this. They find special RV black water tank chemicals to flush down through the system to help stop those foul odors from rising to your RV’s interior.
You will find them anywhere RV supplies and accessories are sold. If they are in stock.
- 7. Close the black water tank valve - this is to be done even if you are hooked up to a sewer system. If you leave the valve open, all the water will run out. However, the waste is left behind. Cleaning this mess is not a fun job.
- 8. Agitate your tanks - if you feel the tanks are not clean and there is still an odor, fill your tanks part way, add some cleanser and drive your RV. Let the motion do the cleaning for you.
Some Final Words
If you like playing kids’ games then you may want to buy an RV. The makers of these vehicles get very creative when it comes to locating parts. The fresh water drain is no exception.

