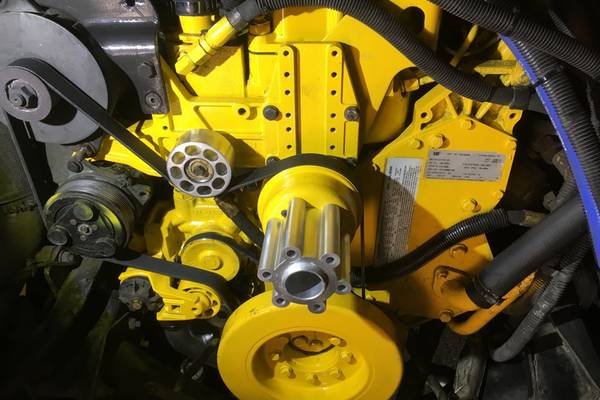
Caterpillar C7 Belt Diagram (Changing The Serpentine Belt)
You may be wondering why we are talking about a Cat C7 belt diagram. This engine and belt design are not limited to Caterpillar construction equipment. It is also used in large buses (think Skoolies) and RVs and can last up to 500,000 miles before needing any major repairs.
The first step in this process is to find the right tools and the right pulley diagram. This part may seem small but it is an important part that runs a lot of top engine parts. The belt also wears out and will need replacing from time to time. It just takes a little patience to get it done.
To learn more about this process and see a diagram just continue to read our article. It has that information and more. Take a few minutes to see how this important information will help you when it is your turn to work on this belt.
CAT C7 Fan Belt Diagram
There are plenty of diagrams on the internet that will give you a great view of the belt design and where it goes.

This is just one of the ones that are available. As you can see, the design is fairly straight forward and you would think that it will be easy to uninstall and replace. Different diagrams may have the belt indentation a little more precise than this one. It will depend on the person who drew the image.
We are not sure what year this diagram represents. Many images do not come with years marked on them. They are just generically placed on the web page or image file and that is all.
2005 CAT C7 Serpentine Belt Diagram
The following diagram is supposed to be for this model of engine and belt year. It looks very close to the one above so design changes seem to be few and far in between.

The instructions to remove and replace this belt are not long nor are they complicated. it just takes using the right tools and the right diagram to help you change the belt. Belts do wear down and will need to be replaced a lot sooner than 500,000 miles.
Check your belts regularly as you can tighten them up for some time before they need replacing. If you hear squeaks you may need to replace the belt. While we will be giving you repair and replace instructions in the next section, this link takes you to a Caterpillar web page that provides a lot more information when you need to work on your engine. You will find a lot of remove and repair instructions for different parts on the C7 engine on that web page.
Take some time to familiarize yourself with the different parts and make sure to save that web page just in case you need to do some extra repairs.
Changing The Serpentine Belt on a C7

Because belts are made from rubber, you can get a lot of use out of them before they need to be changed. They will stretch during use and engine makers have provided a way to tighten those belts up.
Unfortunately, even rubber does not last forever and you will eventually have to buy a new belt and replace the old one. Here are the steps you need to take to do this task:
1. Assemble the tools and get the diagram- it is very important to assemble the tools you will need. A 1/2 inch breaker bar will be needed to release and tighten the tension of the belt. You will also need a 5/8 inch socket and a 1/2 inch deep socket.
2. After opening the engine compartment, insert the 1/2 inch breaker bar and attach it to the tension adjuster. This is found on the alternator. Once there all you have to do is move the breaker bar to the left until you have released enough tension.
3. Once the tension is off the belt, remove the old one and then loosen but not remove the tension adjustment that is located above the water pump.
4. Now use a 5/8 inch socket to remove the belt from the water pump. You will need a 1/2 inch deep socket to reach the water pump tension adjuster on the bottom of the engine. Loosen the bolt once you have the socket in position.
5. When the bolt is loose, rotate the tension pulley bracket and remove the belt by working it around the crankshaft damper
6. Replace the belt with the new one by winding it around the water pump and tension pulley. Re-insert the breaker bar into the tension adjuster and apply the right amount of pressure to tighten it and the belt up.
At the same time tighten the 1/2 inch bolt with the 1/2 inch deep socket. Once that is done, tighten the tension adjuster on the water pump with the 5/8 inch socket.
7. Wind the belt over the fan blades and the crankshaft pulley. Then insert the 1/2 inch breaker bar into the tension adjuster and push it to the left. Wind the belt behind the adjuster and under the idle pulley and over the alternator pulley.
8. Remove the 1/2 inch breaker bar and allow the tension adjuster to pick up the slack on the belt. Make sure the belt is properly seated in each pulley. Start the engine to check your work
Some Final Words
Not every skoolie or RV will have this motor under the hood. It is supposed to be a good engine and the replacement of the belt is not a tough task to do. It just takes a little time and making sure the new belt is where it is supposed to be.
This task should not take that long to do and you should be done in at least an hour at best. Maybe faster if you are really good at this type of work.

