How to Repair an RV Sewer Valve that is Leaking or Stuck
One way to save money is to learn how to fix your RV yourself. At least the simple repairs need to be done by you. That way you can enjoy your RV and get it fixed no matter where you are. Only the most complicated repairs or when you are at your wit’s end should broken RV parts be taken to a qualified RV technician.
How to Repair an RV Sewer Valve that is Leaking or Stuck: Repairing a leaky or stuck sewer valve does not take a lot of mechanical skill. All you have to do for the simplest and quickest fix is to replace the valve with a new one. It only takes a little time and a little wrench turning skills.
To get more details and more information on how to fix a leaky or stuck sewer valve just continue to read our article. It is filled with the information you need to know so you can fix those simple repairs yourself and save a lot of money.
RV Sewer Valve Leak

One estimate given by a professional to fix this problem was about $500. That is because the problem is not conveniently located on the RV. You can avoid this expense by turning to a couple of good fixes that solve the problem for you.
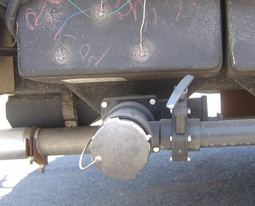
The first fix is done by adding a twist on valve on the terminal end of the dump line. These twist on valves may not look sleek and attractive but they stop the black rush and give you a safety margin to work with.
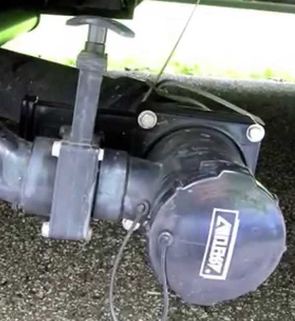
If you decide to remove the valve and replace the seals or replace the valve entirely, the hardest part of the job is flushing the tank and getting them clean enough to remove the 4 bolts that hold the valve in place.
Another tip you should consider, if the black water valve is leaking, you might want to go ahead and replace the gray water valve at the same time. The logic behind this is that if one is broken, it may not be that long before the other one goes bad.
Since you are already underneath your RV, you can save time and energy doing both at the same time.
RV Sewer Valve Stuck Open
There are those RV users who do not see the importance of closing their black water valve and leave it open all the time. When RV users do this, a lot of solid waste material can dry out and clog up the valve.

There are two basic ways to handle this problem. First, you can use some mixture that will eat the clog and loosen the valve. The only thing is you shouldn’t use bleach as that chemical can damage your plastic holding tank and other plastic parts.
The second alternative would be to use a pressure wand to back wash the pipe, valve and tank. The water pressure may be enough to dislodge any dried debris and loosen the valve where it will close again.
The final possible problem could be that the blades inside the valve got stuck during its winter storage time. To fix it, you would have to get inside the valve and loosen the blades manually. Then the next time you winterize your RV make sure you use RV anti-freeze to avoid having this happen again
This may be a dirty job to fix, but it may save you $600 one RV user had to pay when they faced a similar problem.
RV Sewer Valve Won't Open
One of the causes of this problem is that when you winterized your RV some waste material did not get flushed out. When this happens, the waste materials harden and dry out clogging your valve. This keeps the valve from opening properly.
Or the valve is getting old and when this happens it is tougher to pull the cable open and dump your tanks. In either case you will need to replace the valve. One sign that there is a problem is when it becomes tougher and tougher to open the valve.
When this situation arrives, you want to replace the valve before it becomes broken. Replacing the valve prior to breaking keeps you in control of the situation. You get to choose when and where you make the repair.
If you wait till the valve is broken, then you may not have those choices to make. When you do decide to replace the valve try to avoid doing it at a busy dump station. The process takes some time and you do not want a lot of angry RV users waiting for you to finish the repair.
Find a campsite with hook ups or a not so busy dump station when you are ready to do the job.
One maintenance tip to avoid having problems with the valve sticking open or closed. You should spray the valve pull cord once or twice a year with grease or other lubricant. This will help keep the pull cord and blades in shape. Other than that there is not much else you can do to avoid this issue
RV Sewage Valve Broken
This can be a very messy chore to do. Replacing a broken valve can tale some time and there may still be leftovers even after you have flushed and dumped your black water tank.
When replacing the valve, you should try to keep the valve body as vertical as you can. This helps keep waste solids from entering the valve body. It also helps avoid those drying issues that can clog a valve and keeping the valve door from opening or closing.
At no time should you follow the manufacturers and pl;ace the valve horizontally or facing downwards. This is just asking for trouble. Once you have done this installation, you want to make sure to place the cable in a convenient location for easy pulling.
If you do not like the cable system on most manual sewer valves, there is a good solution. Instead of replacing the broken valve with a similar cable type model, switch to an electric valve.
With this switch, you do not have to worry about the cable breaking when you pull on it. All you do is push a button and the valve opens for you. Push the button again and the valve door closes for you.
The only difficult task about this installation is routing the wire connection so that it is out of the way while safe at the same time. You may need a little expert help to do this part of the repair
Do You Keep Your RV Sewer Valve Open or Closed
There are some RV users who leave their black water sewer valve open until it is time to dump the tanks. This is not the right way to handle your black water tanks. The consensus among most RV users supports that sentiment.

The reason you do not keep your black water holding tank valve open is that all thew water will run out and leave the solids behind. When the water goes, then the solids have time to dry and get stuck in your valve.
The valve will become clogged and you will not be able to open or close it. This situation will lead you to costly repairs if you do not handle it yourself. When it comes time to dump your black water tank, it is best to wait till it is about 3/4 full.
This is so because the water volume will help push the solids out leaving little left for the gray water tank to flush out. Always dump your gray water tank after you have dumped your black water tank.
Also, along with closing the black water valve, you should keep the gray water valve closed as well. This position allows for the gray water tank to fill with water and make flushing the sewer lines a lot easier.
How to Replace RV Sewer Valve
When your sewer valve breaks, the only real fix you have available is to replace it. This repair may take you a little while to complete but it is better than spending a lot of money having a professional RV tech do it for you.
Here are the steps you need to follow to make the exchange correctly:
Removing the Broken Valve
First dump and flush the black water holding tank. Then flush it again with the gray water tank
Close the valve and place a open top container underneath to catch any drips
Now find the four bolts. Hold the bolts still with a wrench while loosening the nuts with another one
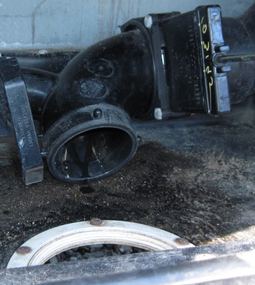
Pry apart the two flanges but be careful. You do not want to break these and ad to your repair expenses. When the flanges are far enough apart, pull your valve out. Make sure to move the sewer pipes if the fit is still too tight to get the valve out
Check to see if the two rubber gaskets came out with the valve. If not, reach in and remove the gaskets
Putting the New Valve On
Clean the flanges first and apply a light coat of grease or lubricant
Put the new gaskets on the new valve. Don’t put them on the flanges.
Carefully slide the valve in place between the flanges. Start the bolts and work the valve gently to make sure it fits in correctly. One tip, use new stainless steel nuts and bolts. This will make replacement the next time a lot easier.
Do not tighten quickly and do not over tighten the nuts and bolts. You want it snug and secure not too tight.
Clean up any mess around the valve and the ground and you are ready for more RV fun
Tips to Avoid Sticky RV Sewer Valves
A little prevention maintenance goes a long way. These tips will help you avoid some of the issues mentioned above. Practicing good preventive maintenance is one way to make sure you avoid costly repairs.
Here are some of those tips:
- Keep the valve rod will lubricated. Use a silicone or Teflon based lubricant and spray it on the rod. After that just work the rod a few times to spread the lubricant around
- Do not use WD-40 to lubricate. The reason for this is that this lubricant can find its way to the seal and ruin it. Instead of lubricating, it makes the seal sticky and hard to use
- You can add a grease fitting to the dump valve assembly. This innovative fix allows you to put grease on the steel rod. The only issue is that the petroleum based grease may also ruin the rubber seal
- Watch the valve handle. If it cracks or has smaller pieces break off, you should replace it as soon as possible. A broken handle makes opening and closing the valve more difficult
- Before you check the valve make sure to check the fittings and the pipes first. The leaking issue may be coming from a cracked pipe or a loose connection
- Use good RV anti-freeze when winterizing your RV. This will help keep the dump valves from becoming sticky after they have sat for a long time
Some Final Comments
It is a messy job but someone has to do it. If you do not want to fool with broken or stuck dump valves then you can pay out a lot of money and have the professionals handle it for you.
But if you are like most of us and not made of money, then learning how to fix your dump valves is the best way to go. You save money and time by fixing the issue right where you are. Just make sure to have the right protective equipment and clothing on hand before you get started.
Simple solutions work the best and one simple solution to a leaky dump valve is by adding a twist on valve. This protects you and keeps you from having a messy clean up to deal with.
IN most cases, you can fix leaky or stuck valves with a little know how. The easiest fix of all is simply to replace the old valve with a new one. You can also opt to install an electric one making opening and closing the valve a lot simpler.
No matter how you handle these issues, go with the best fix for you.

