How To Replace, Seal, or Repair RV Underbelly (Helpful Guide)
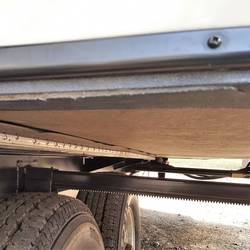
The underneath area of your trailer is often vulnerable to the wind, cold and small animals. Covering it with what is called an underbelly prevents the wind, cold and small animals from entering your trailer. However, you still have to maintain it.
There is no one way to do these three tasks. With so many products on the market to use for your underbelly, each one has its own best method for installation, removal and repair. Your work will depend on the type of material the RV maker or you have decided to use to protect this vulnerable area.
To learn more about this topic, just continue to read our article. It has the information you need to know about so you can do a good job when doing any one of these three tasks. Keeping your underbelly in top condition is important.
How Do I Fix The Underside of My Camper?

The answer to this question depends on the material used to seal the underbelly. If the material used was flexible tarp-like material, then depending on the size of the problem, you could get away with using tape made especially for this area.
Or if you have sheets of Coroplast or similar products, you just remove the broken sheet and replace it with a new one. These sheets are usually nailed or screwed into place and you just remove the screws of nails to get the old sheet off.
Sometimes RV makers use one solid piece of corrugated plastic to seal the underbelly. If that is your case, then you may have to redesign the underbelly and place tinier sheets up in its place.
Older RVs and trailers had wood or metal pieces used to seal the underbelly. These are heavier and harder to remove. Tape may work to patch smaller holes but you have to see if the tape you want to use will work on those materials.
RV Underbelly Repair
This needs to be done carefully and you should have some help when you are doing this repair. If the material is long, one-piece or heavy, you should have a friend help you. This will help keep the material from crashing down on you.
Or you can use special stilts and supports to replace your friend when one is not available. These supports will hold the sheet in place until you get the screws out and you are safely out of the way.
But before you do all of that, you first have to examine the damage to see what type of repair is needed. If it is a small hole or tear, there is some good flex tape on the market that will seal those holes or tears up nice and tight. No help is needed for this type of repair.
If the material comes in a roll, you may have to get help or work in small increments, cutting out the damaged section and replacing it with new material. Your repair work will depend on the material used, its size and weight.
How To Access RV Underbelly

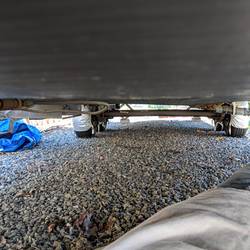
If you are talking about getting underneath the RV or trailer, then the simplest and only way to access the underbelly is to jack up the RV, etc. Make sure to have some jack stands handy to hold the weight while you are underneath your RV, etc.
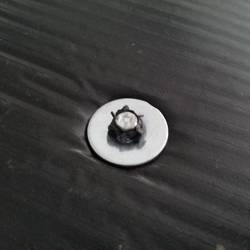
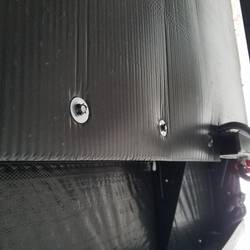
If you want to access the area underneath the underbelly, then you have to find out what type of fasteners were used to secure the material in place. Some RV makers use nails, others use screws and still more use Hilti-type fasteners that are shot into the frame through the underbelly material.
The screws and nails are the easiest to remove while the Hilti type option may require some heavy prying with a crowbar or cat's paw. In both situations, you need to make sure the RV or trailer is very secure when it is lifted and held off the ground.
The work you will be doing can cause some vibrations or movement and you do not want the RV, etc. coming down on you.
How To Replace RV Underbelly
No matter the material used for this vulnerable area the process is the same. The first step is to see how it was fastened in place. That method will help you determine which tool you need to use to remove the fasteners.
If it was screws that were used, then you would need a drill with a screwdriver bit and a reversible drive. This method doe snot take long. If it was nails that were used, you may be able to use your drill to remove the nail part way, then a hammer or crowbar, etc., to get the nail out the rest of the way.
If the installer used a Hilti or similar type tool, then your tool of choice would be a crowbar. Once you get the old underbelly off, it would be a good idea to use your drill and good screws with washers to install the new underbelly.
That would be the easiest and fastest method, plus, it will help save time in the future. This task is just a matter of taking the old underbelly off and putting the new one on.
How To Remove RV Underbelly

It has to be said, you need to do this task carefully. If the underbelly was installed in one piece or many large pieces, you will need help in removing it. Those pieces are not fun when they land on you after removing the last or next to last screw or nail.
You have to take out those screws or nails one at a time and go in a logical order so you can stay safe while you work. The easiest material to remove would be the flexible underbelly materials.
They are lightweight and should not hurt if they fall on you. Once off, you just roll it up and throw it away. Installation of these rolls of material is also easy as you can just unroll just enough, attach that portion then unroll more as you go.
The hardest material to remove will be wood, metal and those other materials that were shot with a Hilti gun. Part of the difficulty will be in how deep the RV maker or installer went with their screws and nails.
Suffice it to say, this will be a time-consuming task as you have to work slowly and do your back.
Finding RV Underbelly Replacement
This is not going to be hard to do. Since many RVs and trailers come with enclosed underbellies or have had it installed, there are many parts and other RV service outlets that have this material in stock.
The biggest part of this process is deciding which material you will use. There are a variety of products from corrugated plastic materials like Darco and Coroplast to cloth-like options that are made from Polyethylene.
You can go to wood or metal if you don’t mind the weight, the rot and the corrosion possibilities but those other options are better and cheaper to use. You can find these materials at Amazon, the many big box stores and specialty RV parts and services outlets.
The covered underbelly is not a new or rare idea. You should have no trouble finding some near you and at a price, you can afford. They also come in different sizes so you can customize how your new underbelly will go on.
RV Underbelly Upgrade

This is also not a hard task to do except in the decision-making process. You just need to look at your current underbelly material, then compare it to what is on the market today. Then choose which is the best option and will fit your budget.
Part of the upgrade process will be determining how you want your underbelly to look. If you do not like the one-piece situation, you can get underbelly material in smaller sections that go on individually or in rolls where you can easily cut and attach any way you want.
The upgrade will be in the type of material you will use, how it is designed and how easy it will be to install or remove, if necessary. All the stores mentioned in the previous section will help you with this task.
Some Final Words
Repairing, sealing and replacing your underbelly is not a difficult task. It is standard work like replacing the siding on your traditional home. The only difference is that you will be working on your back, not your feet.
Picking the right material is essential as you want to keep the wind, cold and small critters out from your RV or trailer. Take your time, and do some comparison shopping to get the right material for your camping situation and budget.

