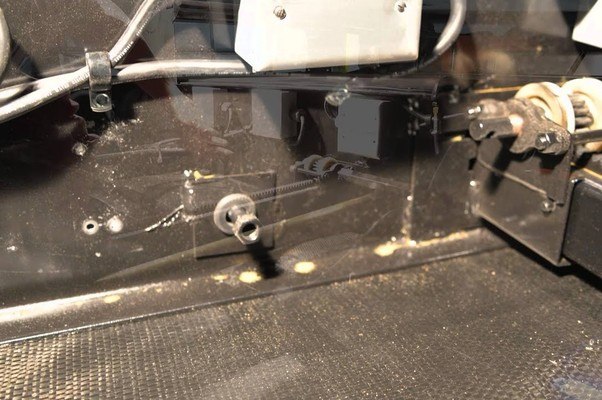
RV Slide Out Relay Location: Override a Slide Out Mechanism
When it comes to special features, you never know what RV makers will come up with. Some designs are for safety reasons while others just do not make any sense. Operating your slides may be a combination of those two categories and will have you scratching your heads in bewilderment.
If your RV is equipped with a Lippert slide system, then the manual over-ride crank is next to the motor along the main chassis rail. It should be at the end of the motor and there should be a pin there as well. Your system may be different from this one.
To learn more about manual override mechanisms, just continue to read our article. It has the information you need to know about in case you do have a power failure and you need to break camp. Keep in mind that not all slide designs are the same.
How do You Override a Slide-out Mechanism?
Each slide-out system is going to be different than the one we can present here. The following steps are for a Jayco 2011 travel trailer and you may have the same setup or something similar.
- Step 1: Make the right checks first - these are important as they could save you some work. If the slide-out doesn’t move when you push the button, check to see if the slide-out system is turned on, the battery is charged and connected and all transit bars are removed ( if you have them).
- Step 2: Turn the slide-out system to the off position - this can be a key or just a switch but it should be off when you want to manually override the system. It won’t work if the switch is on.
- Step 3: Now find the slide-out electrical controller - this can be a 6 pin connection or have motor leads. Unplug the former and disconnect only one of the latter from the controller.
- Step 4: Locate the motor - this should be on one of the slide-out rails. If your RV has an underbelly or a cover over the motor you will have to remove those parts to access the motor location.
- Step 5: Turn the brake lever - once you find the motor, look for the brake lever and turn it about 1/8 of the way in the counterclockwise direction. This releases the brake.
- Step 6: Look for the manual override - this could be a crank or a nut, etc.
- Step 7: Use the right tool - there can be a crank already there or you can use a socket wrench or some other wrench to crank the room out or in, depending on your camping situation.
- Step 8: Re-engage the brake - this is done once you have the slide-out in the position you want it in.
- Step 9: Install any transit bars if your system has any and when you ou are breaking camp, head to the closest dealer to check the system out.
One word of warning before you start this process. Some slide-out systems have specific steps you need to take before they will operate electronically. You may have missed a step thus your slide-out won't work.
On some systems, you have to have the engine running, your vehicle in park, and the emergency brake on before the slide-out system will engage. Make sure you do all the steps in the right sequence before turning to the manual override option.
Here is the link to a Lippert slide-out manual which provides pictures and more instructions.
How do I Reset My RV Slide Out?
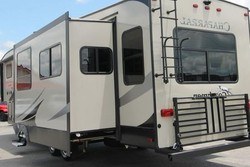
The Lippert slide-out system seems to be used in about 70 brands of RVs. These instructions should help you reset the system and make sure that your slideouts are timed just right. These instructions are for the Schwintek In-Wall System.
When you find that one side of the slide is not fully extending as fast as the other side, you need to re-time it. The first step in the process is to press the extend button until the slide is fully extended.
Once that is done, you press the ‘in’ button until the slide retracts about 8 to 10 inches. The third step is to repeat steps one and two a minimum of three times or until the slide is re-timed and all sides move evenly.
The reason this process is necessary is that this system works with 2 motors and both of them count the number of revolutions. When slides do not or are not fully extended or retracted completely, those motors lose count and do not know where zero is.
During those three repeat in and out motions, those motors find that zero point and can start counting correctly again. To prevent this situation, when you extend or retract the slide-out, you want to press the button for up to 5 seconds longer.
What that does is help the motors find their zero point again.
RV Slide Out Relay Location
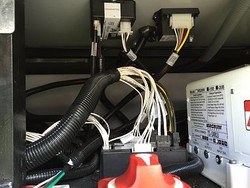
These are not really that hard to find. If you have a battery control center then those relays will be there. The trick is finding your battery control center. On some models, it is in the first basement bay behind the entry door.
Other models of RVs, like the Fleetwood Excursion 2004, may place those circuit boards where the relays sit on the back wall. If you have 3 slide outs there should be 3 circuit boards side by side.
Later models of the Fleetwood Excursion (2006+) the relays may be located in the electrical bay on the right side of the RV. Some people have found the relays in a box in front of the motor.
What this tells you is that the relays could be placed just about anywhere on different RVs. It just depends on the mood of the design engineers where they will go. As you can see the same model but different years had two different locations.
Take the time to search your owner’s manual for the slide-outs to see where those relays are located. If the manual doesn’t tell you, ask your dealer or a mechanic familiar with your model. They should be able to take you to the exact spot, show you how to open the box or bays, and point out the relay locations.
RV Slide Out Switch Wiring Diagram
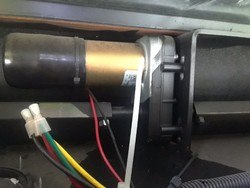
One of the things you will notice when reading the websites or the actual diagrams for slide-outs is that the authors seem to be speaking in a different language. The words are English but there is no glossary telling you what those words mean or give simpler easier to understand synonyms.
A wiring diagram is a simplified image showing you all the detailed components in their proper place. Understanding the terminology is a different story. Instead of trying to translate all the harder-to-understand terms, we will simply link up to a couple of diagrams that have different instructions or explanations to them.
The first one will be to help you troubleshoot any issues with your slide-out relays or other mechanisms and the second will be to an explanation. For troubleshooting click here and for an explanation click here.
If you are not good at electronics, it is best to let the RV electronic experts worry about your relays and diagrams. Sometimes electrical diagrams are hard to read as there are so many different symbols and lines on them. Save yourself the trouble and let the experts handle the troubleshooting of your relays, etc.
Fleetwood Slide-out Relay Location
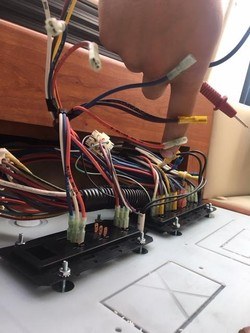
This could in a variety of places depending on the model of Fleetwood RV you own. We have already provided the location for the Fleetwood Excursion models however, Fleetwood is not consistent in locating the relay switching.
For the Prowler 31G 2002, the control panel is near the floor under the bed at the front of the RV. If the flooring or carpeting gets wet then the circuit board may short out and you will have lots of fun trying to control your slide out.
For the Prowler, this seems to be the preferred location for Fleetwood as the 2004 model has a fuse relay underneath the queen size bed. We checked two owner’s manuals that Fleetwood publishes and they do not give the location of the relay switches. Nor do they give the location of the control panels. However, we included them here so you can find the override switch locations. Here is one and here is the other.
Sometimes you really have to search to find the circuit boards containing the relays for your slide-outs. Do that before you go on the road so you can find them quickly when you need to.
How do You Manually Retract an Electric Slide?
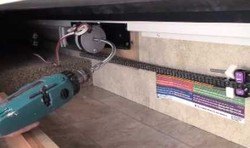
On most systems, and the ones we already mentioned above, you simply reverse the process. You go in the opposite direction of the one you use to extend the slide-out. However, this may not always be the case.
On some Tiffin models, all you have to do is disconnect the wires to the controllers and the slides can be simply pushed back into place. That is if you are strong enough to handle the weight of the bigger slide-outs.
On some hydraulic systems, it is said that you merely drain the hydraulic fluid out and then you should also be able to push the slides back into their retracted position. Most often, you will have a crank to use that is positioned next to the slide-out frame.
The word is that in the early years of slide-outs there were a lot of problems with the electrical mechanisms. However, over the years, the companies that make RVs or those that make the slide-outs, have improved on the technology and design so these issues do not arise that often.
Of course, you could get a lemon, like some owners do, and have nothing but problems.
Troubleshooting Your Stuck Slide Out
Before you start reaching for the over-ride system and begin pushing your slide-outs back into place. Follow these steps first to see what the real problem may be and do not assume:
- 1. Do a visual search - the cause of your slide-out problems could be as simple as a tree branch falling onto your slide-outs. The sticks or branches can stop your slide out from working and all you need to do is remove those obstacles.
- 2. Check your levels - if your RV is slightly out of level, then your slide-outs may not work.
- 3. Check your fuses - these can blow on you and while you are checking the fuses you can check the breakers as well. They can trip without letting you know.
- 4. Check your batteries - make sure they are fully charged and not disconnected. Look for frayed or loose wiring as well. Also, check for corrosion on the terminals and clean them up. Tighten or reconnect everything else.
- 5. Check the wiring - this is from the battery to the slide-out control box or motors. Make sure there are no broken or loose wires.
- 6. Check the JST connector - make sure it is connected securely and while you are at it, make sure the switches have not worn out. Also, double-check to see if you followed the right sequence to operate the slide-outs.
Some Final Words
One thing about owning an RV. You won’t have a lot of free time on your hands. You will be using it to find all the hidden parts on your vehicle or trailer. Sometimes you will not have a lot of help in locating relays or circuit boards. You just have to keep looking.

